Thanks to the Pixel Art editor, you can easily create your own Pixel Art and share it with your family, friends, colleagues, or students, as well as the entire community by publishing it on the website!
The Pixel Art games is in the game module were all created using this editor. Here are a few steps to follow.
Step 1: Choosing a theme
You can create pixel art from scratch. But it’s much easier to start from an existing image. Our editor can analyze the image and pixelate it, leaving you to refine it. And if the pixelation doesn’t give good results, you can use the image as a layer to easily draw on the grid.
I recommend this method, especially if you are a beginner.
The image to be chosen must meet some important criteria:
- It does not contain any details;
- it avoids gradients;
- it has easily distinguishable color ranges;
- it presents a specific topic;
You can use photos, but drawings are often easier to work with because they are already simplified.
If you’ve decided to create a small grid (10×10, for example), opt for icon designs, which are already simplified and in a small format. Be aware, however, that the pixelation result may be disappointing. Often, for small grids, it’s better to draw the entire grid yourself, using the image as a template.
The aspect ratio is also important. A square image is close to the native format of our grids. A rectangular image may need cropping if you want to avoid completely empty sidebars – which is also easy to do in our editor.
It is often useful to modify an image in a drawing program before importing it into Actilud, particularly to crop it and remove transparency. Accepted image formats are those used by web browsers: “jpg”, “jpeg”, “png”.
Initially, if you’re unsure what grid size you want to create, use the default grid: 35×35 pixels in 5 colors (+1 for empty cells). The pixelation process allows you to reduce the number of colors, and the cropping tool allows you to reduce the grid size.
If you choose an image from the Internet, choose one that is royalty-free:
In Google Images, search for your image and, on the page that opens, choose Tools, Usage Rights, Creative Commons License.
To help you, I have prepared an image of a blue tit. I found it on the Internet and modified it: the colors are a little more saturated, I added a blue background to encourage the pixelation algorithm to add a little more blue, and I made it square to avoid cropping the grid. I also chose it so that it wouldn’t be too easy to use and would give you a little challenge to do. Here it is, ready to download for your tests (right-click, save image as…).
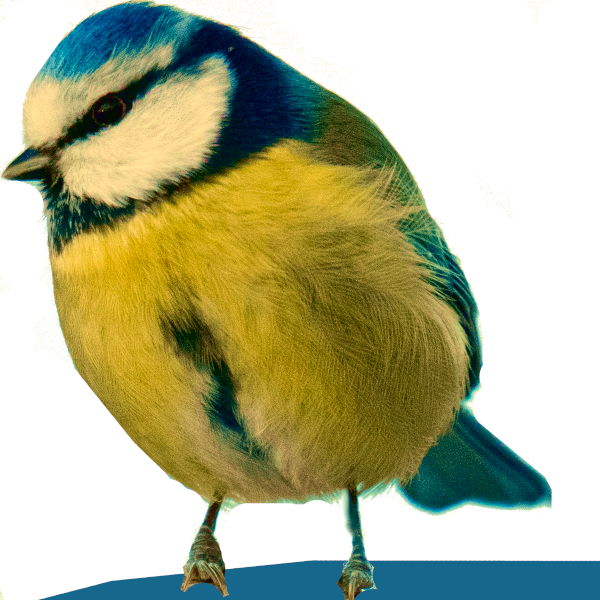
An image for your tests.
Step 2: Start a grid
With your image in hand, start your grid. Indicate the number of colors, rows, and columns: you’ll arrive at a blank grid. If you’re unsure what to choose, leave the default format (35x35x5) as you can always change it later.
Here, for example, is the screen showing a 15×15 grid in 5 colors.
![]()
The grid is in the center; two side panels, at the top and left, will contain the game’s coding. You’ll notice that the panels are exactly 12 squares long. This is the maximum allowed number of transitions between color ranges in the relevant row.
![]()
The eyelet in the upper left corner allows you to shift the grid’s rows or columns left, right, up, or down. The shift is done by rotation: the row that disappears on one side reappears on the other. If you make a mistake, simply shift the row in the opposite direction. This allows you to adjust the position of a drawing to one side.
![]()
The color bar has six colors. However, in the settings, we requested five. This is actually the number of colors that will be present in the pixel art when it’s finished. The sixth color is for the “empty” squares—by default, a semi-transparent gray. This is the square marked with an eraser. In a game, an empty grid is always colored this way. The color of the empty square is important: it needs to be sufficiently different from the other colors, while still being neutral. White, black, or gray, with varying degrees of transparency, are good choices.
The second color, marked by a horizontal line (white here), represents spacing. This color is never mentioned in the coding panels. It’s used to separate color ranges. This is the heart of the puzzle: finding where to place the spaces between the ranges.
 Of course, the colors can be changed at any time. Use the eyedropper tool in the toolbar. Then click on one of the colors in the palette and modify it. To exit, click on another color or elsewhere on the page. To exit color mode, click the eyedropper tool again.
Only the first color can have a transparency value. The other colors are always opaque.
If you have an image, don’t rush to use the eyedropper tool! The pixelation process will automatically assign a color to each square in the game. All you’ll need to do then is adjust the colors with the eyedropper tool and choose a suitable color for each empty square.
For our test with the blue tit, stick with the 35x35x5 layout.
Step 3: Pixelate the image
![]()
Click on the “Watermark Image” tool. In the window that opens, choose an “image” file and load it into the editor. You can then experiment with different settings (size within the grid, watermark percentage, zoom, offsets, and inversions). Note that the size within the grid remains constant if the image is square. If the image is rectangular, the “Fill” option displays part of the image within the grid, filling the entire available area; this results in some edges being lost. The “Inside” option places the entire image within the grid, creating empty strips around the edges.
Automatic mode
Start by using automatic mode. It generally gives good results. If it’s not satisfactory, switch to manual mode.
What interests us here is the “Pixelate and smooth in Grid” button. Click it and observe the result in the grid. You can repeat this several times; in most cases, the result will vary. Also, observe the color palette: it reflects the changes. To perform the pixelation, Actilud uses the k-means algorithm, which starts with a random number generator. This is interesting for us because this algorithm offers multiple solutions.
To choose the best result, don’t focus on the exact hue values: you can change them later. Instead, prioritize results that offer large color swaths with minimal fragmentation. Avoid isolated pixels as much as possible. Choose a result with large areas of solid color. If some details are missing, that’s okay. For example, the right leg of our blue tit is consistently cut off; we’ll correct the details later.
This is also the time to reduce the number of colors. This can be useful if you notice that a color is underrepresented. Feel free to experiment.
Note: Once pixelation is complete, the image disappears entirely. It is not deleted, but made completely transparent. This allows you to better appreciate the result in the grid. To view the image at any time, click the “50%” or “opaque” button.
Once the result is acceptable, close the watermark window.
Manual mode
In this mode you set the color palette yourself.
First, click the “Pixelate image” button. You will get a pixelated image in the grid containing a large number of colors; usually more than five. Unlike what happens in automatic mode, the grid is not affected. The image you see is a layer that you can make more or less transparent. Leave it opaque.
Once this is done, you need to select the reference colors from those in the resulting image. Click “close” to exit the watermark selection window. We’ll come back to it later.
Observe the image carefully. First, decide which color will serve as the spacing color. Then, identify the most frequently used colors. Once you’ve made your selection, click the eyedropper tool in the toolbar, then select the color swatch corresponding to the fill color in the tool palette. The color selection window will open.
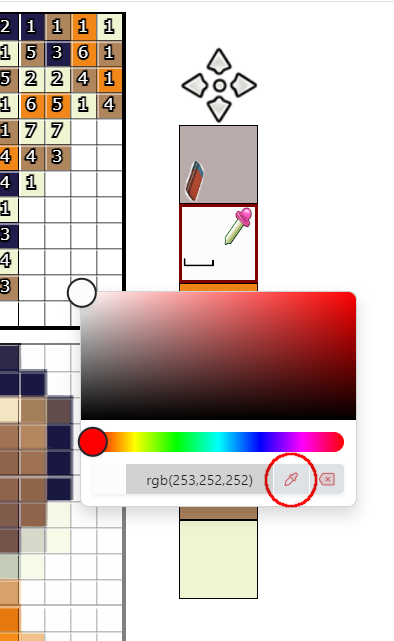
In this window, click the eyedropper icon – see the illustration above. Then, go to the grid and click on a colored square corresponding to the space color. Repeat the same procedure for the other colors. It is essential to choose colors that are within the grid. If a color does not match, the encoding will not occur.
Then return to the “Watermark Image” window. Click on “3 – Pixelate and smooth colors”. If you have correctly selected the colors in the grid, you will see the result in the grid.
Step 4: Simplify in the grid
As explained at the beginning of this presentation, the number of transitions between color ranges is limited to 12. Therefore, we will have to redo all the rows or columns that are a little too complex.
![]() This is the role of the “generate code from image” tool – the image in the grid, not the one you uploaded. In the window that opens, click the first button: “generate code from image”. In the grid, the side panels will automatically populate – except for rows containing too much information, which will then flicker.
This is the role of the “generate code from image” tool – the image in the grid, not the one you uploaded. In the window that opens, click the first button: “generate code from image”. In the grid, the side panels will automatically populate – except for rows containing too much information, which will then flicker.
Then exit the generation window and modify the overly complex rows directly in the grid. It’s easy: simply change the color of certain cells. Always try to simplify the details. Start with the individual cells. When you’ve finished a row or column, test the result again. Then move on to the next row or column.
Once there are no more errors, you can then refine the details. For example, you can reinforce the beak and legs of our titmouse, repair the broken leg, or enhance or modify some of the colors. Personally, I also change the color of the ground and replace the brown band on its belly with blue, which is the representative color of this blue tit. Always double-check that the code generation is working correctly.
Change the spacing color
You can swap the spacing color with one of the other colors. Generally, the background color is preferred as the spacing color. This seems the most natural. However, the pixelation algorithm might assign a different color. You can therefore change the value at this stage. Also note that the difficulty of the puzzle can vary depending on the chosen spacing color. But, to remain consistent, always choose a spacing color that matches the background color.
Step 5: Code!
Once the preliminary steps have been correctly completed, let’s move on to coding. In the “generate code from image” tool, click the “Generate code from image” button and then attempt to generate the calculated model.
The calculated model is the grid resulting from the coding performed in the side panels. If the coding is successful, the number of passes indicates the difficulty level of your drawing. The calculated model is identical to the edited model, and the grid remains in edit mode. You can then save your work as a game file.
If the coding indicates an error, the calculated model is incomplete. The grid then displays the calculated model. By comparing it to the edited model, you can identify the problematic cells. This occurs when there are still several possible placements for certain ranges. Sometimes, simply modifying a few cells in strategic locations is enough to unlock an entire grid.
When the advisor and toolbar display this icon, you cannot edit the cells in the grid. The displayed model is the calculated model, which is constant. To switch to the editable model, click this icon in the toolbar.
 When the advisor and toolbar display this icon, you can edit the grid. To return to the calculated model, click on the tool.
Switching between models allows you to compare your work with the calculated model.
It is often necessary to go back and forth between making changes and calculating in order to obtain a correct final result.
Step 6: Save
 You can save your work at any time. However, when the calculated template is available, you can also save it in “game” format. The “game” format only contains the grid and color information. This file can be used in the game module. To do this, when saving, check the “save as game” box. If this box is unavailable, either there is no calculated template, or you have made changes to the edited template—in which case you will need to generate a new calculated template.
When you save your work in the standard format, the imported image is stored in your file. Therefore, during a subsequent work session, it will not be necessary to load it again.
Subsidiary step: contribute, publish!
It would be a shame to keep your work only for yourself and your loved ones. Send it by email to webmaster at actilud.com. If your email address is valid, I will add it to the list of existing productions after review. I will be sure to let you know by return email.
The conditions are quite simple:
- You are the author of the work
- You authorize the publication free of charge.
- You agree that your work belongs to the public domain.
- You retain ownership of the work and can request its removal from the site at any time.
- If you wish, your contributions can appear under the pseudonym of your choice.
Thank you in advance for your contribution: you are helping me to enrich the content of this site.
Other tools
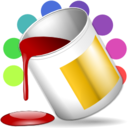
The paint can
Allows you to paint specific areas within the grid. Click on the paint pot, choose the color, and then click on a square of a different color within the grid.
If you make a mistake, use the “undo” tool.
![]()
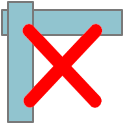
The cropping tool
Allows you to remove empty rows at the periphery. A row is empty if it contains only cells with the color “empty” or the color “space”.
When the cropping is done, the grid has changed size.
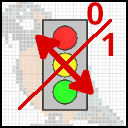 Stop/show the flickering of erroneous rows
The eraser: to erase the grid.

Settings. Allows you to change the grid size and the number of colors at any time.

 Enables / disables the guide rulers. See “Pixel Art: how to play”.